
72 Users Online
![]() Attach
|
Attach
|
![]() Edit
|
Edit
|
![]() Revisions
Revisions
![]() Related Content
Related Content
The #Steyr #AUG is manufactured in #Australia and is used by #military #forces all over the world. Being a bullpup, the longer barrel in a shorter overall length provides numerous advantages in airsoft. This article shows you how to disassemble the AUG airsoft rifle.
We are going to illustrate the disassembly process with the JG UA-3 RAS AEG. That is because the JG UA-3 RAS is a Steyr AUG A2/A3 variant with the quad-rail up front. It has one additional disassembly step compare to the A1 version. That extra step is the removal of the quad-rail.
Cross-Reference
We have a review article for the JG UA-3 RAS. You can read about it here: "JG Urban Assault UA-3 RAS Airsoft Electronic Gun Review".
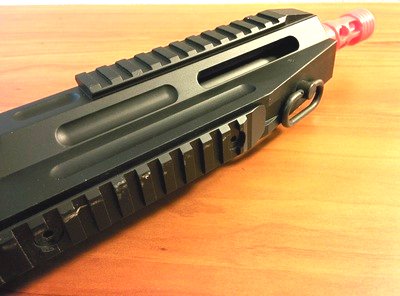
There are two hex screws on the top front portion of the Picatinny rail (see photo below). Unscrew these two hex screws.
Then push the quad forward and remove it (see photo below).
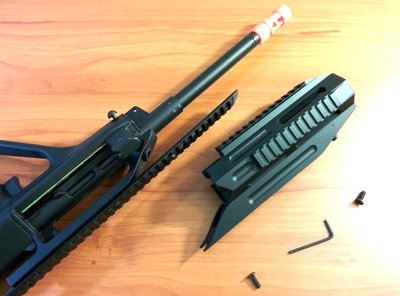
From this point forward, the reset of the disassembly process applies to all airsoft AUG AEG's.
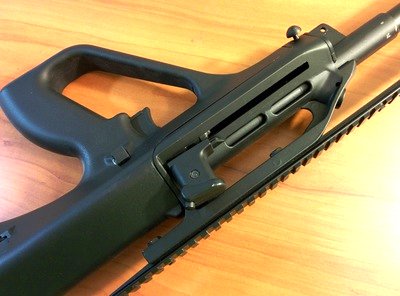
To detach the external barrel, you need to pull the charging handle back first (see photo below).
After pulling the charging handle back, you can unlock the external barrel. The unlocking mechanism is the knob on the left side in the photo below.
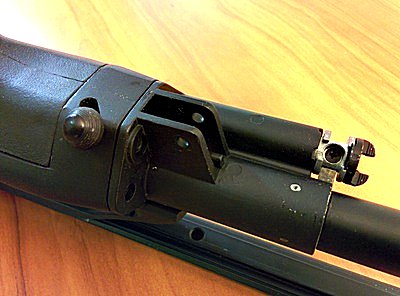
Once the external barrel is unlocked, pull the external barrel forward to remove it from the gun (see photo below).
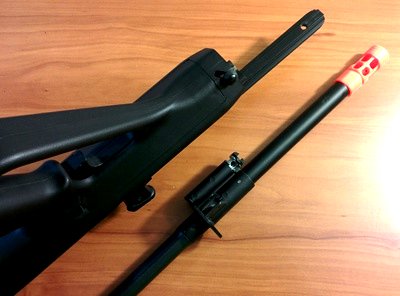
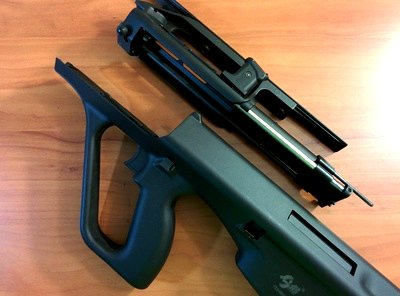
The receiver can be separated. To do so, you have to slide the safety switch completely out of the gun. Once you've done that, pull the receiver apart (see photo below).
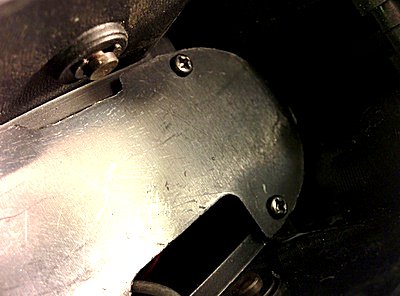
The gearbox is in the shoulder stock. To remove the gearbox, you have to go through the battery compartment. There is a cover that is attached by two small screws (see photo below). Remove the two screws and remove the cover.
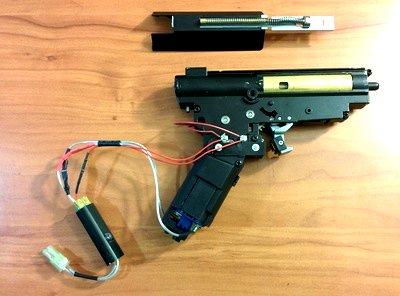
After removing the cover, you can slide the version 3 gearbox out (see photo below).
A Phillips screw (see photo below) on the bottom of the magazine, close to the winding wheel, allows you to take it apart.
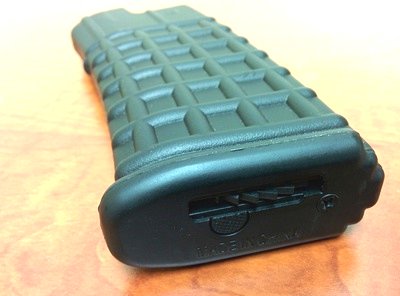
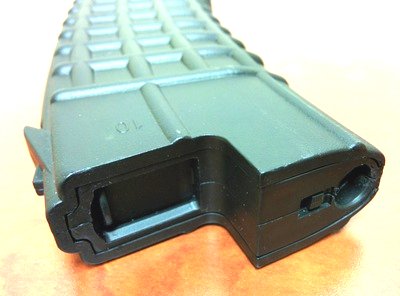
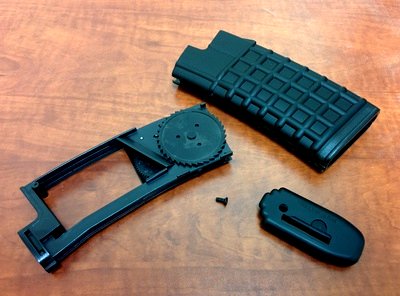
Once you unscrew the Phillips screw, you can slide the bottom plate off the magazine. Then you can push the magazine insert upward and remove it from the top of the magazine (see photo below).
The following photo shows the disassembled pieces.
![]() Attach
|
Attach
|
![]() Edit
|
Edit
|
![]() Revisions
Revisions
![]() Related Content
Related Content