
105 Users Online
![]() Attach
|
Attach
|
![]() Edit
|
Edit
|
![]() Revisions
Revisions
![]() Related Content
Related Content
The CenterPoint Tactical Universal Laser and Flashlight Kit provides a laser sight and a tactical flashlight for your firearm. In this article, we are going to review the components of this package.
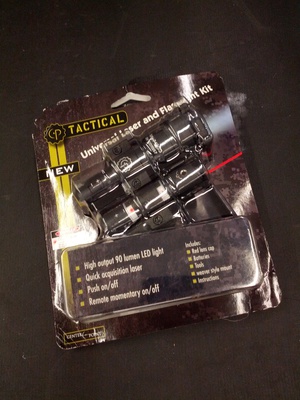
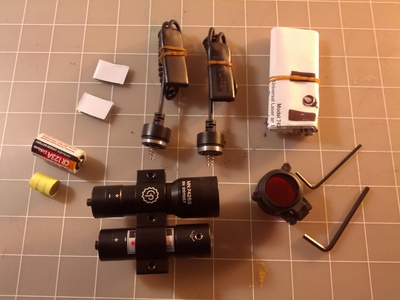
The following components are included in the package:
The kit comes with two types of batteries (see photo below). One of the batteries is the CR123A lithium. The 3 volts CR123 battery is normally used in old film cameras. In the case of this kit, it is used in the tactical flashlight.
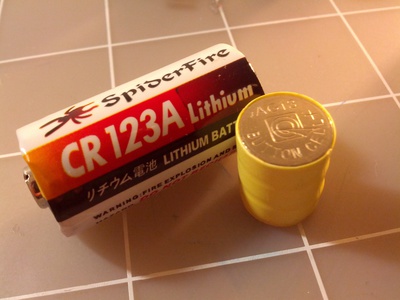
The other type of battery is the 1.5 volt AG13. The kit includes three AG13 batteries in a shrink-wrap. All three batteries are used in the laser sight at the same time for a total of 4.5 volts.
The laser sight is made out of a metal shell. I believe it is aluminum, because the body around the battery opening has a slight dent in it. I'm not sure if I made the dent or if it came with a dent, but it's obviously a relatively soft metal. Nevertheless, the body is made out of metal and feels robust.
The laser sight utilizes a class IIIa laser diode, which produces a red laser with a wavelength of 645 nm +/- 10 nm. It puts a small dot on the target at any practical distance. Two adjustment hex screws allows you to adjust the elevation and windage (allen wrench is included). The 2mm adjustment screws are not marked. That's a good thing, because its circular body allows you to mount the laser in any orientation within the mounting bracket.
The tactical flashlight has a metal body and feels rather beefy. It's somewhat larger than the laser sight, but not overbearing when mounted right next to the laser.
The tactical flashlight utilized a LED with a output of 80 - 90 lumen. Apparently, I never had a flashlight so bright before. Because I looked at the illumination from three feet away for just a quick second and it blinded my eyes. After removing the light source, it took many seconds before the blind spot went away. It was a very uncomfortable feeling.
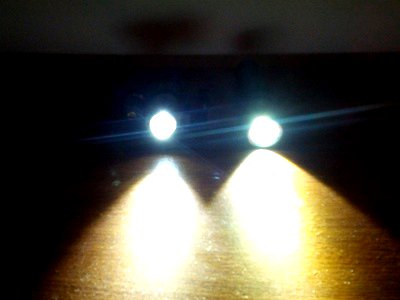
If you are wondering whether the CenterPoint flashlight really produces 80 - 90 lumen, take a look at the photo below. The CenterPoint Tactical Flashlight is on the left, while the Enercell LED Flashlight (84 lumen) is on the right. The brightness is about the same.
Cross-Reference
See our Enercell LED Flashlight Review for details of the Enercell LED Flashlight.
A red filter is included. It attaches to the front of the flashlight and can be flipped out of the way (see photo below). The red filter serves many purposes: 1) it reduces the light intensity for more discreet situations, such as map reading; 2) it does not deteriorate the night vision your naked eyes are accustomed to as great as white light; 3) deers do not see red light as well so it is useful for pre-dawn hunting.
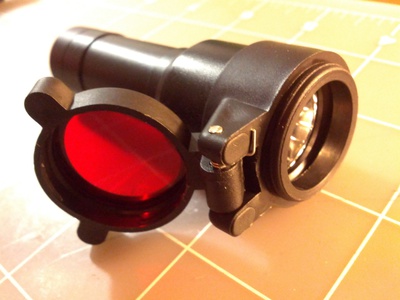
Overall, the red filter works well. But because it latches via friction, sometimes it flips open on its own when jarred. That's an issue if you are in the middle of combat and you accidentally jar the flashlight.
A metal mounting bracket for both the laser sight and the tactical flashlight is included in the package. The bracket has Picatinny weaver mount, so you can mount it to any gun with this standard rail. The laser sight and tactical flashlight are pre-installed on the bracket, but you can easily remove them with the included allen wrench. The photo below shows the bracket all by itself.
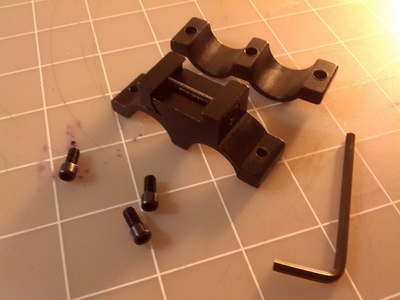
The hex screws for the mounting bracket is larger than the hex screws for the laser sight adjustment hex screws. Therefore, two different allen wrenches are included in the package. The 3mm hex wrench fits the mounting bracket hex screws.
It is one bracket for two devices. That means you can't mount the laser sight and the tactical flashlight on two different guns. If you need to do that, you can get around the problem by getting two individual brackets.
The package includes not only on/off switch caps for both the laser sight and tactical flashlight, but also includes remote pressure switches for both. Whereas the on/off switch stays on or off on toggle, the pressure switch only turns on the laser sight or flashlight when you hold the switch. The pressure switches have long coiled wires that are attached to battery caps (see photo below).
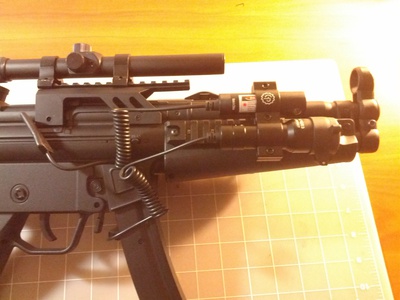
The photo above shows the laser sight and tactical flashlight installed in the bracket and mounted to rails on a MP5. Everything is black, so it's rather difficult to see in the photo unless you look at each distinct item carefully.
The laser sight and tactical flashlight uses the same screw thread for all battery caps. But because the outer diameter is different, they will fit onto the respective device different if you use the wrong cap on the wrong device. Nevertheless, the wrong cap on the wrong device will still function just as well.
The pressure switch is rather long. After activating it a few times, I realized that there are two switches inside each pressure switch. The two switches are wired in parallel so that activating either of the two switch will turn on the device. I suspect the two switch provide redundancy in reliability; when one internal switch fail, you can still use the other one.
The laser sight is rather easy to disassemble. To disassemble it, just unscrew the head from the body. The photo below shows the laser sight disassembled.
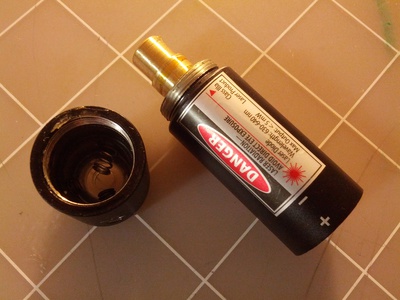
Once you have disassembled it, it's obvious how the laser sight is adjusted (see photo below). The laser diode is mounted flexibly. A spring pushes it in one direction. Two adjustment screws allows you to push the laser diode back toward the spring.
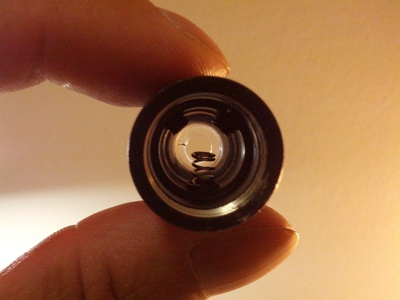
But once the laser sight is disassembled, it's not easy to put back together again, unless you know the trick. On the other side the of the adjustment screws is a blotch of dried glue. There is a hidden screw under the glue. Pry the glue away to reveal a screw. The screw is for the insertion of the spring after reassembling the laser sight.
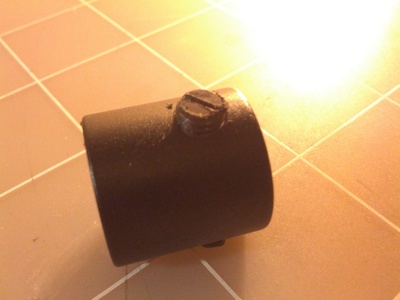
To reassemble, remove the spring and unscrew the adjustment screws. Screw the laser diode head and body together. Insert the spring and screw it down. Then use the adjustment screws to zero in the sight.
![]() Attach
|
Attach
|
![]() Edit
|
Edit
|
![]() Revisions
Revisions
![]() Related Content
Related Content